INSTRUCTIONS FOR USING BARTENDER SOFTWARE TO DESIGN LABELS
The article below will guide people to use BarTender software to design labels. To perform the steps below, you need to have BarTender software pre-installed on your computer.
Step 1: Get Started By Going To BarTender Software
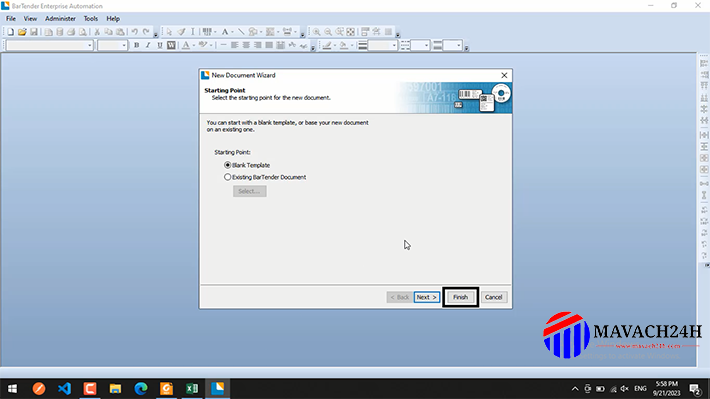
- Open the Bartender software installed on the computer.
- Click the "Finish" button to create a blank stamp template.
Step 2: Configure Label Size
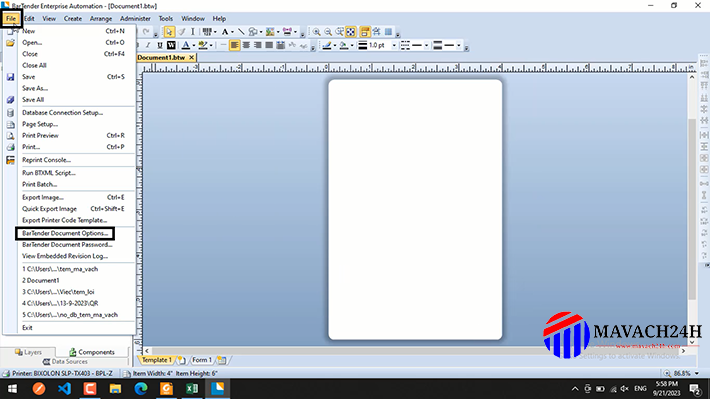
- Select "File," then select "BarTender Document Options."
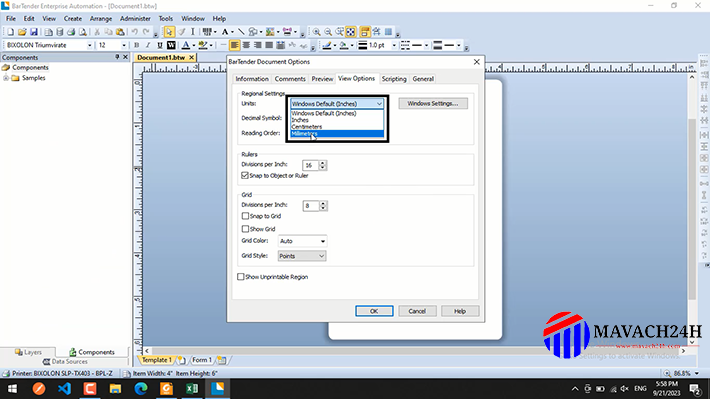
- In the "View Options" tab, adjust the units to match the label you want to design.
Step 3: Set Label Size
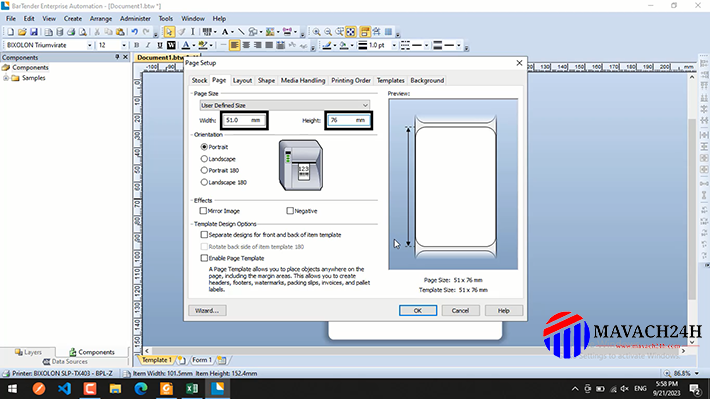
- Double-click on the stamp template to display the "Page Setup" window.
- At the "Page" tab, you can adjust the stamp size, including "Width" and "Height".
- At the "Layout" tab, you can adjust the stamp layout, including "Rows" (number of rows), "Columns" (number of columns), and margins (margins), which should be left at 0.
Step 4: Add Text
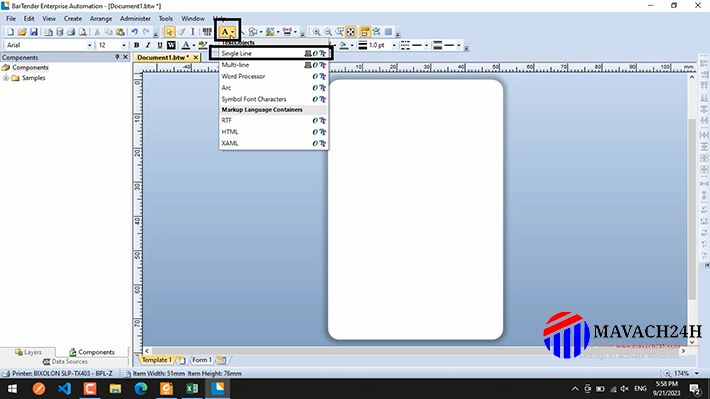
- Select the "A" icon in the toolbar and select "Single Line".
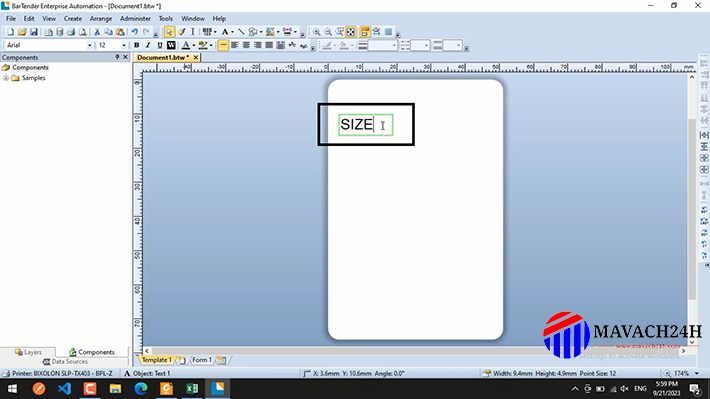
- Click on the stamp template and enter what you want to display.
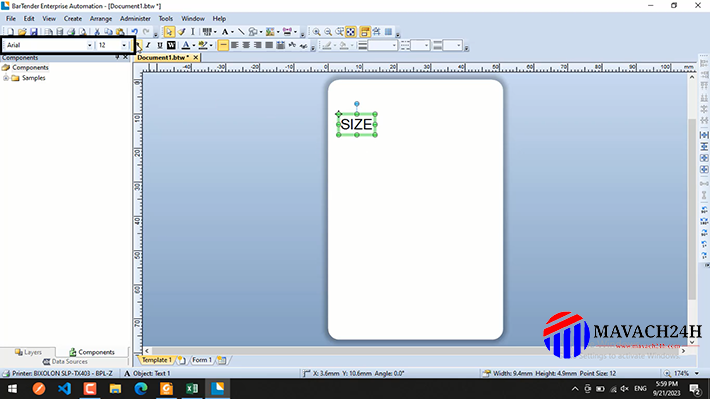
Step 5: Customize Font and size
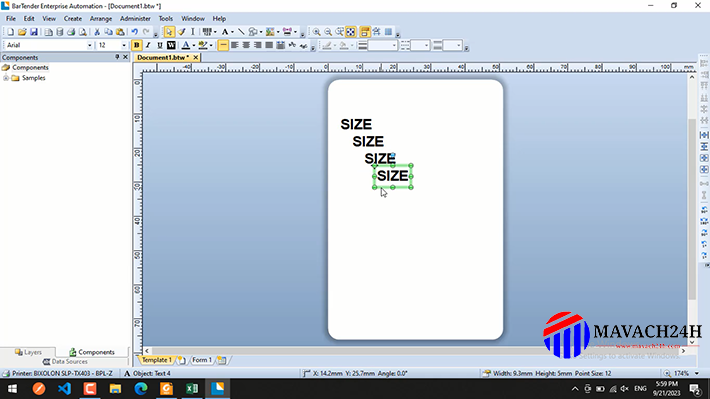
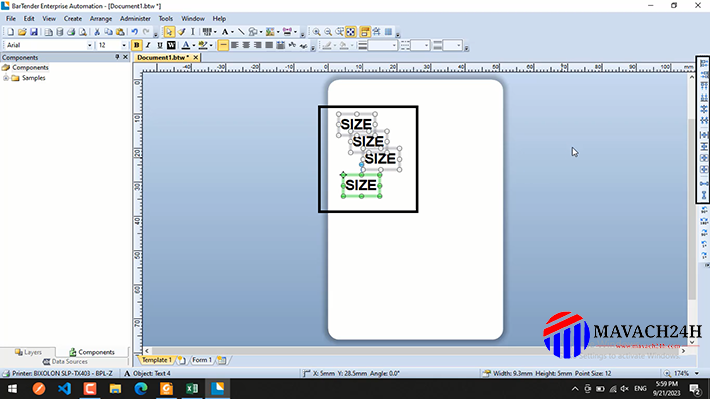
Step 6: Copy and Paste Objects
- Use the key combination "Ctrl + C" to copy and "Ctrl + V" to paste the selected object.
Step 7: Alignment
- Select the text or barcode object and choose one of the alignment styles in the right toolbar to align the object as desired.
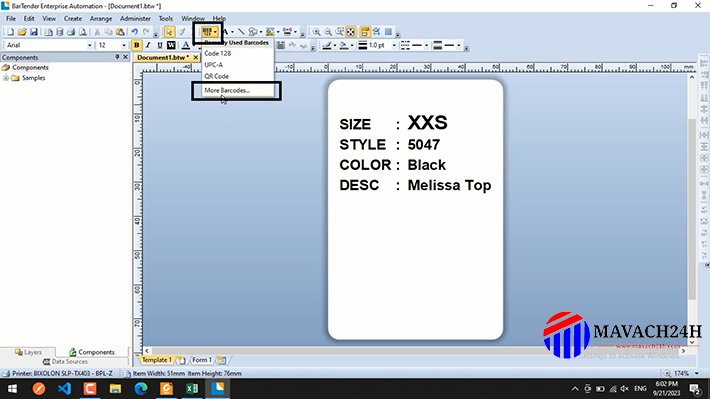
Step 8: Create Barcode (Barcode)
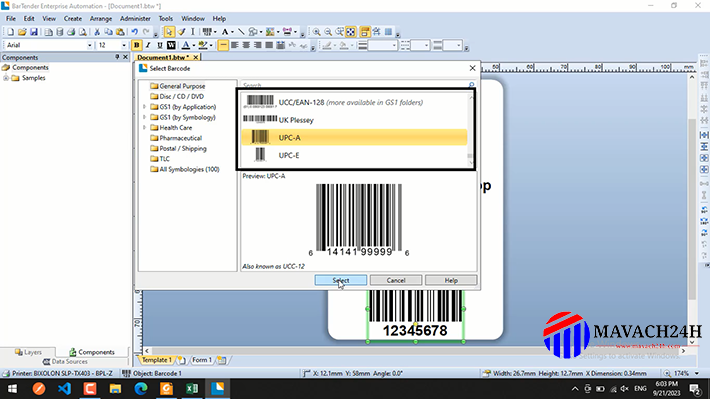
- Select the "Barcode" icon on the toolbar and select More Barcodes.
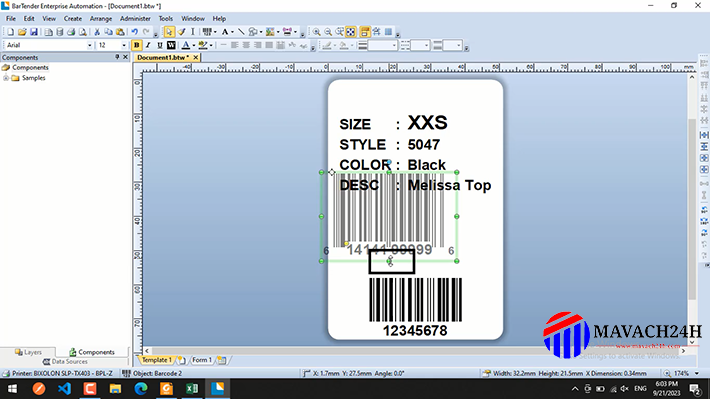
- Select the type of barcode you want to create.
- Adjust barcode size.
Step 9: Connect to Excel File
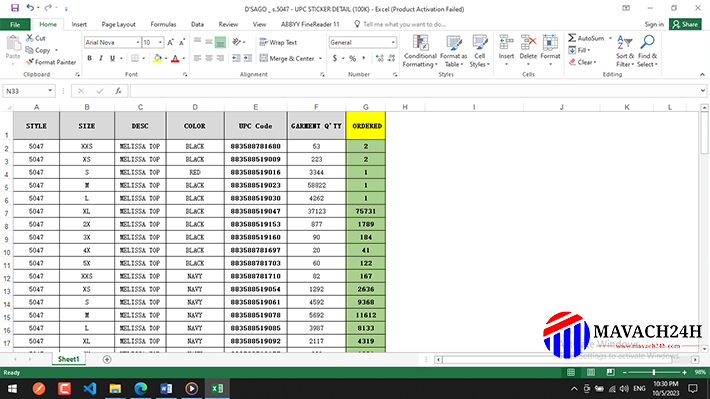
- Create an Excel file containing the data that needs to be changed on the label.
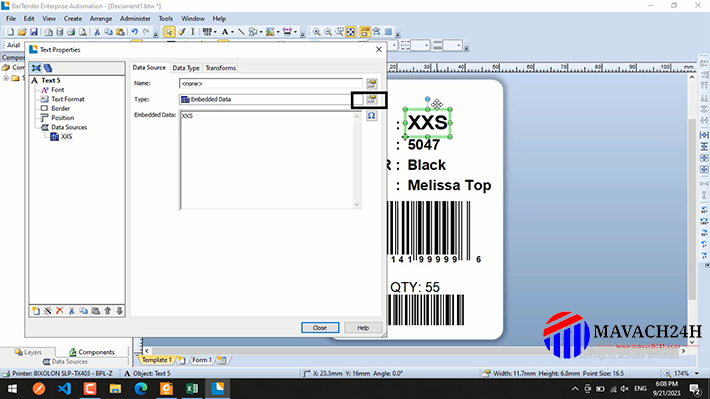
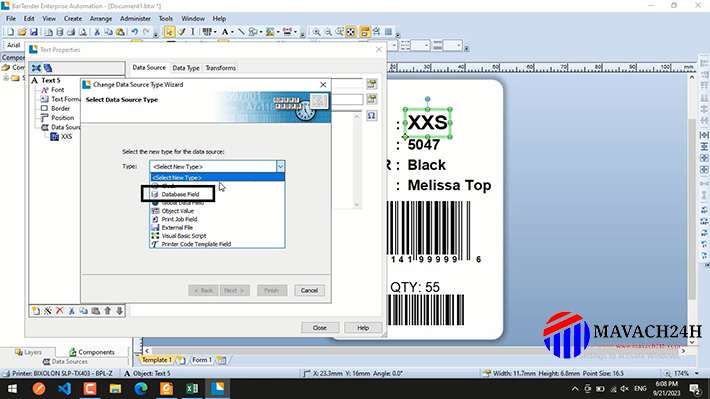
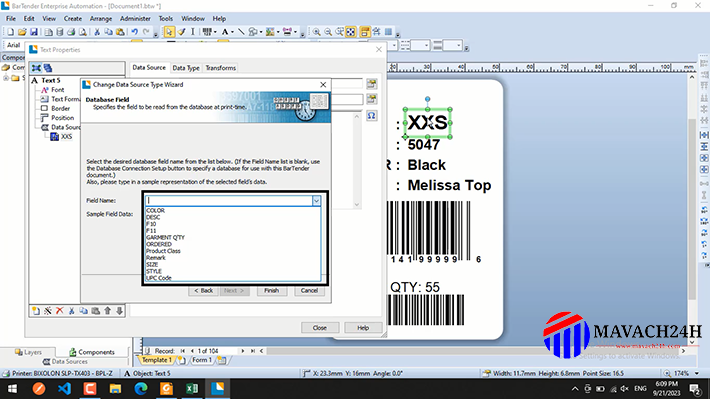
- Double click on the Text or barcode, select "Change Data Source Type".
- Select "Database Field".
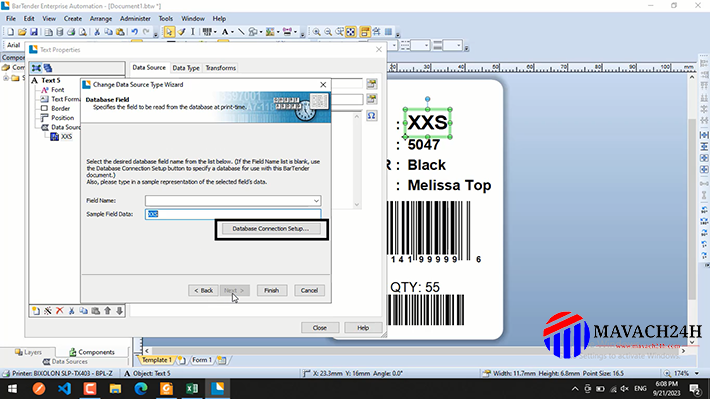
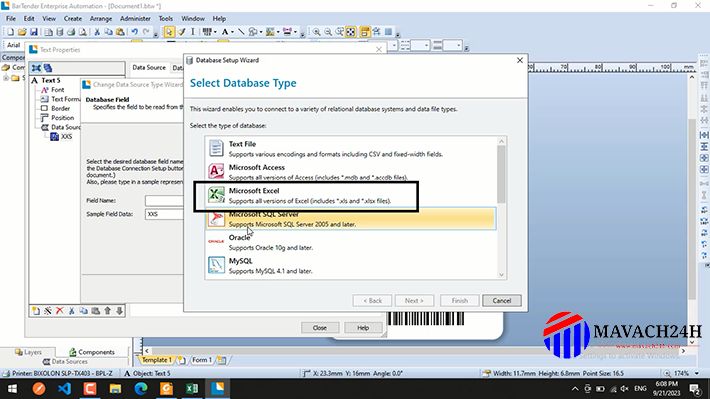
- Select "Database Connection Setup"
- Select "Microsoft Excel".
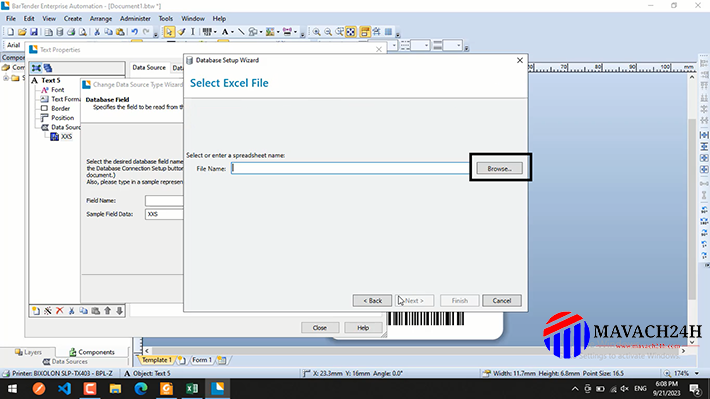
- Select "Browse".
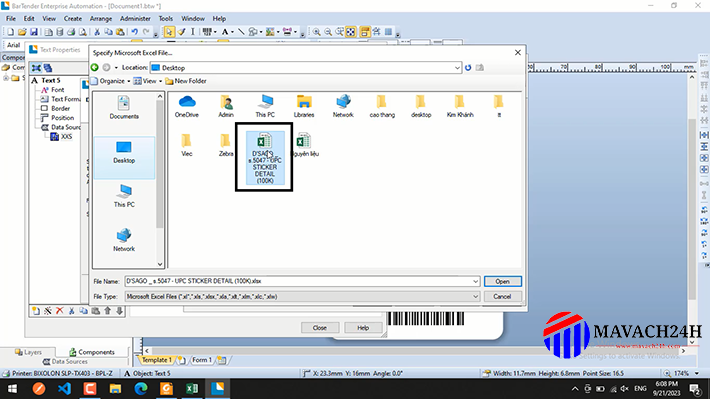
- Select the Excel file to connect.
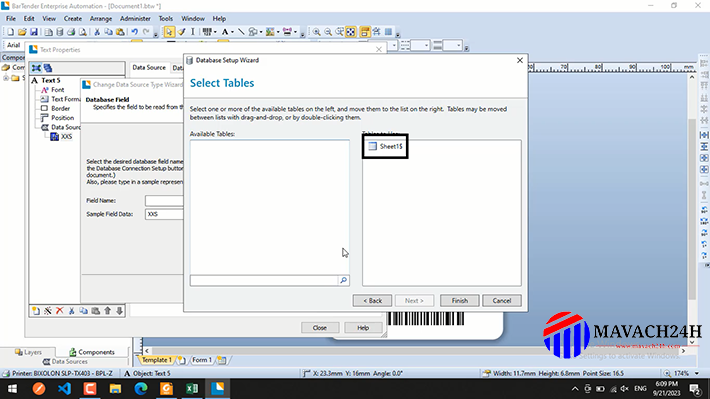
- Select the corresponding "sheet".
- After successful connection, select the column containing data corresponding to text or barcode
Step 10: Print the Label
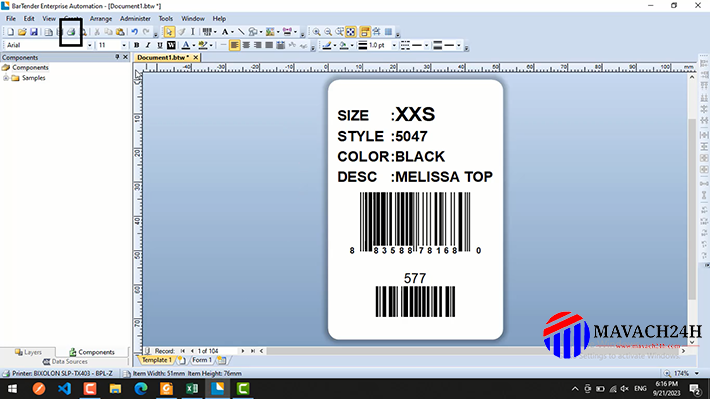
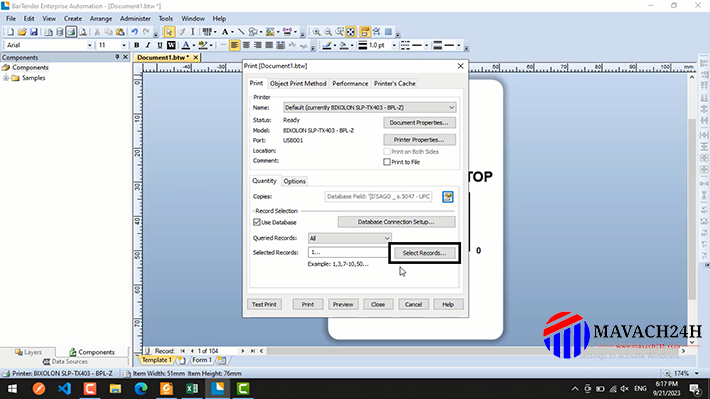
- Tap the "Printer" icon on the toolbar.
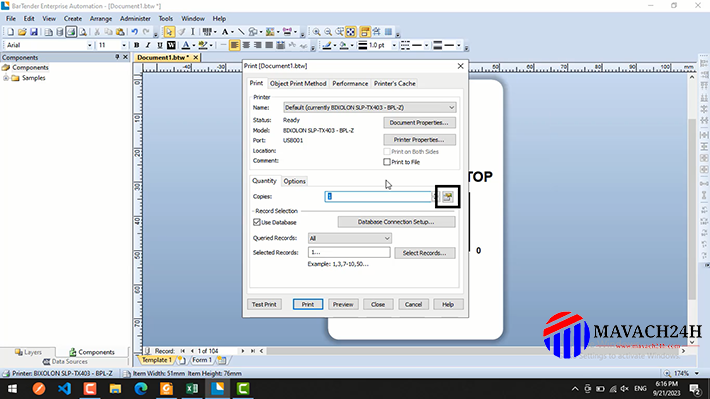
- Select "copies".
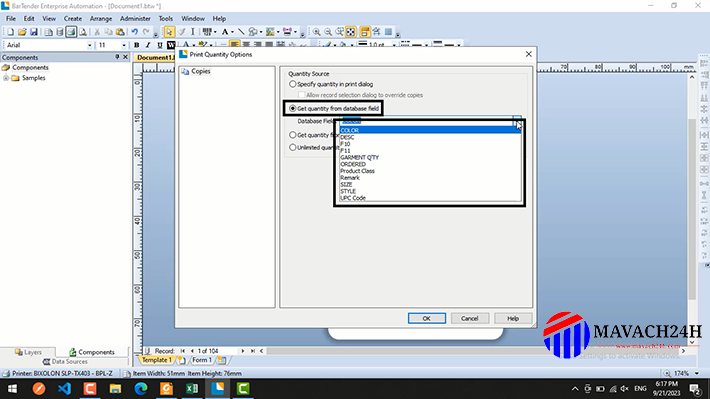
- Select "Get quantity from database filed" and select the column containing the quantity
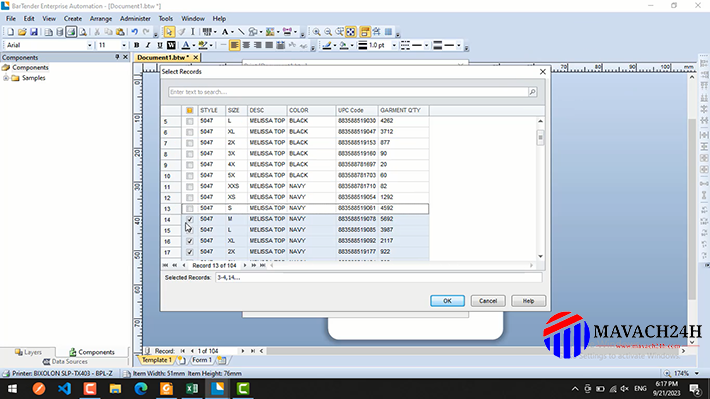
- Select "Selected Records".
- Choose to print by checking or not checking.
With the detailed instructions above, you can easily design labels using Bartender software. If you need support or have questions, watch the video below or contact us.





main.comment_read_more